3장 Facebook 로그인 추가
OAuth란?
일단 Facebook은 OAuth 라는 방식을 이용하여 소셜로그인을 서비스하고 있습니다. 이 방식은 Facebook뿐 만 아니라 대부분의 소셜로그인은 OAuth을 기반으로 하고 있습니다. OAuth도 검색을 하시면 좋은 정보가 가득 나오니 자세한 설명은 생략하겠습니다만, 간단히 이야기 하자면 만약 페이스북으로 소셜로그인을 한다면 페이스북은 실제 유저정보(ID, password등)의 정보가 아니라 access Token이라는 Token을 넘겨주게 됩니다. 그 후에 우리가 페이스북을 통해 어떠한 일을 하고 싶다면 access Token을 페이스북에 보내면 그러한 요청을 실행시켜 줍니다. 설명이 어렵습니다만 그림을 보시면 간단합니다.
oauth 2.0 은 인증, api 를 합친 형식이다. 이 부분이 중요하다. 일단 인증 부분만 살펴보자. 밑의 그림을 보면
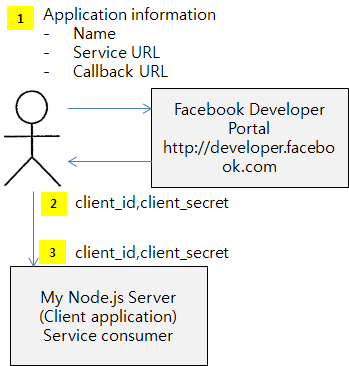
이용자는 페이스북 서버에 현재우리사이트(서비스 사이트, 이용자가 페이스북로그인을 통해서 로그인 하고 싶은 사이트)의 정보를 페이스북에 넘긴다.
1-2. 페이스북은 로그인 창을 띄우게 된다.이미 로그인이 되어있다면 이부분은 생략
1-3. 로그인 뒤에 대략 이런 창을 페이스북은 보여준다. 여기서 allow를 누르면 페이스북은 우리 사이트가 이 유저에게 접근할 수 있는 token을 넘긴다.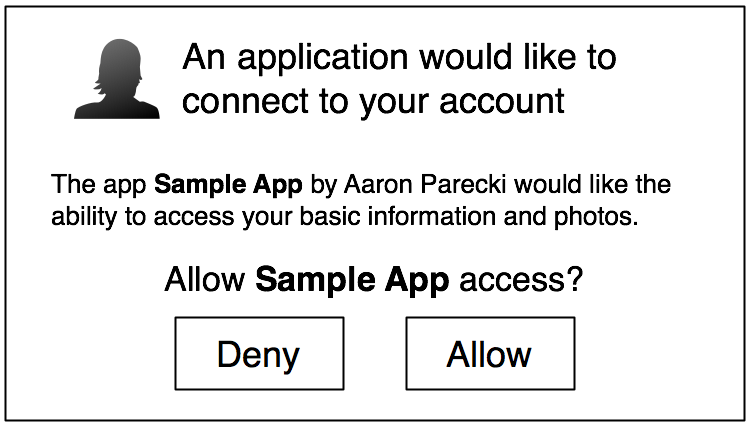
페이스북은 이용자에게 현재우리사이트에서 페이스북에 접근 할 수 있게 만드는 토큰(이 토큰이 우리사이트가 페이스북의 유저 계정에 접근 하는 것을 허락해 준다)을 넘겨준다.
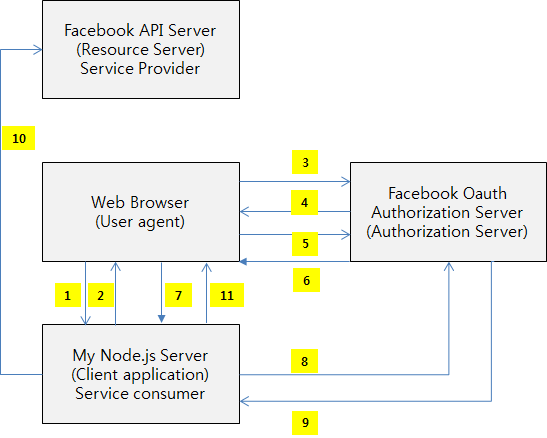
정확한 그림으로는 이런 그림입니다. 엄청 복잡해 보이지만 실제로는 별로 어려운 작업이 아닙니다. 혹시 아직 이해가 안되시다면 댓글을 달아주세요. 또는 구글에 검색하시면 됩니다만..
소셜로그인 준비
https://developers.facebook.com 에 접속. 오른쪽 위의 My apps을 클릭. Add a New App을 클릭 웹사이트를 선택하시고 하라는 대로 진행하시면 됩니다. 그 뒤 appID을 받으시면 됩니다. 세팅에서 add Platform을 클릭하여 http://localhost:3000을 추가. 실제 서비스 할 때에는 주소를 추가해 주시면 됩니다.
실제 코딩
2장에서 했던 것을 이어서 하겠습니다.
routes/api.js에 밑을 추가.
/***********************************
 *           FB Login              *
 ***********************************/
router.post('/login/facebook', function(req, res, next) {
    var fbUserEmail = req.body.fbUserEmail;
    var fbAccessToken = req.body.fbAccessToken;

    var findConditionfbUserEmail = {
        email: fbUserEmail
    }
    users.findOne(findConditionfbUserEmail)
        .exec(function (err, user) {
            if (err){
               res.json({
                   type: false,
                   data: "Error occured " + err
               });
            }
            else if (!user){
                console.log('user not found');
                fbSignup(fbUserEmail, fbAccessToken, function (err, savedUser) {
                    console.log(1);
                    if (err){
                        res.json({
                            type: false,
                            data: "Error occured " + err
                        });
                    } else {
                        res.json({
                            type: true,
                            data: savedUser,
                            token: savedUser.jsonWebToken
                        });
                    }
                });
            }
            else if (user) {
                console.log('user');
                console.log(user);
                user.fbToken = fbAccessToken;
                user.save(function (err, savedUser) {
                    res.json({
                        type: true,
                        data: user,
                        token: user.jsonWebToken
                    });
                });
            }
        });
});

function fbSignup(fbUserEmail, fbAccessToken, next) {
    var userModel = new users();
    userModel.email = fbUserEmail;
    userModel.fbToken = fbAccessToken;
    userModel.save(function (err, newUser) {
        newUser.jsonWebToken = jwt.sign(newUser, jwtSecret);
        newUser.save(function (err, savedUser) {
            next(err, savedUser);
        });
    });
}
이번에는 email, password 가 parameter가 아니라 email과 accessToken이 parameter 입니다. 혹시 나중에 우리가 user의 정보를 원한다면 이 accessToken을 사용하여 얻을 수 있습니다. 그리고 accessToken은 유효시간이 있기때문에 로그인을 할 때 마다 갱신해주도록 합시다.(실제 어플에서는 client의 유효시간을 보고 로그인을 하고있어도 지속적으로 갱신해야 합니다. 로그인기능만을 사용한다면 이 정도로 충분합니다) 왜 signup을 따로 요청을 받지 않냐고 물을 수 있지만, signup이 따로 필요하지 않습니다. 굳이 만들려고 하면 1장을 local부분처럼 하면 됩니다. 또는 응답해줄때 이 회원가입인지 아닌지를 판단해 주면 됩니다. 대략
res.json({
          type: true,
          data: savedUser,
          token: savedUser.jsonWebToken,
          newUser: true
         });
res.json({
          type: true,
          data: savedUser,
          token: savedUser.jsonWebToken,
          newUser: false
         });
정도로 구분하면 되겠군요. 그리고 나중에 프론트엔드에서 응답이 newUser: false라면 추가 회원가입 정보란으로 이동하면 될 것 같습니다. (또는 유저 정보 수정란등)
이제 프론트 엔드로 넘어갑시다.
// This is called with the results from from FB.getLoginStatus().
  function statusChangeCallback(response) {
    console.log('statusChangeCallback');
    console.log(response);
    // The response object is returned with a status field that lets the app know the current login status of the person.
      //response 객체는 현재 로그인 상태를 가지고 있다.
    // Full docs on the response object can be found in the documentation for FB.getLoginStatus().
    // response object의 자세한 정보는 FB.getLoginStatus()의 도큐먼트에서 찾을수 있다.
    if (response.status === 'connected') {
      // Logged into your app and Facebook.
        //facebook을 통해 로그인 되었다.
      testAPI();
    } else if (response.status === 'not_authorized') {
      // The person is logged into Facebook, but not your app.
        // 페이스북에는 로그인 되었지만 앱에는 로그인 되어 있지 않다.
      document.getElementById('status').innerHTML = 'Please log ' +
        'into this app.';
    } else {
      // The person is not logged into Facebook, so we're not sure if they are logged into this app or not.
      // 페이스북에 로그인 되어있지 않기 때문에, 앱에 로그인에 되었는지 안되었는지 알 수 없다.
      document.getElementById('status').innerHTML = 'Please log ' +
        'into Facebook.';
    }
  }

  // This function is called when someone finishes with the Login
    //이 함수는 로그인 버튼이 끝났을때 불러진다.
  // Button.  See the onlogin handler attached to it in the sample
  // code below.
  function checkLoginState() {
    FB.getLoginStatus(function(response) {
      statusChangeCallback(response);
    });
  }

  window.fbAsyncInit = function() {
  FB.init({
    appId      : '***************',
    cookie     : true,  // enable cookies to allow the server to access the session
                        // 쿠키가 세션을 참조할수 있는지
    xfbml      : true,  // parse social plugins on this page
                        //  이 이페이지에서 소셜로그인 분석
    version    : 'v2.5' // use graph api version 2.5
  });

  // Now that we've initialized the JavaScript SDK, we call
  // FB.getLoginStatus().  This function gets the state of the
  // person visiting this page and can return one of three states to
  // the callback you provide.  They can be:
  //
  // 1. Logged into your app ('connected')
  // 2. Logged into Facebook, but not your app ('not_authorized')
  // 3. Not logged into Facebook and can't tell if they are logged into
  //    your app or not.
  //
  // These three cases are handled in the callback function.
       // 자바스크립트 SDK를 초기화 했으니, FB.getLoginStatus()를 호출한다.
  //.이 함수는 이 페이지의 사용자가 현재 로그인 되어있는 상태 3가지 중 하나를 콜백에 리턴한다.
  // 그 3가지 상태는 아래와 같다.
  // 1. 앱과 페이스북에 로그인 되어있다. ('connected')
  // 2. 페이스북에 로그인되어있으나, 앱에는 로그인이 되어있지 않다. ('not_authorized')
  // 3. 페이스북에 로그인이 되어있지 않아서 앱에 로그인이 되었는지 불확실하다.
  //
  // 위에서 구현한 콜백 함수는 이 3가지를 다루도록 되어있다.

  FB.getLoginStatus(function(response) {
    statusChangeCallback(response);
  });

  };

  // Load the SDK asynchronously
    // SDK를 비동기적으로 호출
  (function(d, s, id) {
    var js, fjs = d.getElementsByTagName(s)[0];
    if (d.getElementById(id)) return;
    js = d.createElement(s); js.id = id;
    js.src = "https://connect.facebook.net/en_US/all.js";
    fjs.parentNode.insertBefore(js, fjs);
  }(document, 'script', 'facebook-jssdk'));

  // Here we run a very simple test of the Graph API after login is
  // successful.  See statusChangeCallback() for when this call is made.
    // 로그인이 성공한 다음에는 간단한 그래프API를 호출한다.
  // 이 호출은 statusChangeCallback()에서 이루어진다.
  function testAPI() {
    console.log('Welcome!  Fetching your information.... ');
    FB.api('/me', function(response) {
      console.log('Successful login for: ' + response.name);
      document.getElementById('status').innerHTML =
        'Thanks for logging in, ' + response.name + '!';
    });
  }

  //이 밑은 div의 facebookLogin함수의 정의 입니다. 이러한 방법으로 쉽게 사용이 가능합니다.
    function facebookLogin() {
        FB.login(function (response){
            if (response.status === 'connected') {
                var fbAccessToken = response.authResponse.accessToken;
                console.log(response.authResponse.accessToken);
                FB.api('/me',{fields: 'email'} ,function(response) {
                    var fbUserEmail = response.email;
                    console.log(response);
                    console.log(JSON.stringify(response));
                    document.getElementById('status').innerHTML =
                        'Thanks for logging in, ' + response.name + '!';
                    var postUserInformation = {
                        fbUserEmail: fbUserEmail,
                        fbAccessToken: fbAccessToken
                    }
                    console.log(postUserInformation);
                    $.post('/api/login/facebook', postUserInformation, function(response){
                        console.log(response);
                    });
                });
            }
        },{scope: 'public_profile, email'});
    }
    function facebookLogout() {
        FB.logout(function (response){
           alert('logoutted');
           document.getElementById('status').innerHTML = 'Please log ' +
            'into this app.';
        });
    }
index.html에는
<fb:login-button scope="public_profile,email" onlogin="checkLoginState();">
</fb:login-button>
<div onclick="facebookLogin()">FaceBook login button</div>
<div onclick="facebookLogout()">FaceBook logout button</div>
<div id="status">
</div>
을 추가해줍니다.
여기서
window.fbAsyncInit = function() {
  FB.init({
    appId      : '*************',
    cookie     : true,  // enable cookies to allow the server to access the session
                        // 쿠키가 세션을 참조할수 있는지
    xfbml      : true,  // parse social plugins on this page
                        //  이 이페이지에서 소셜로그인 분석
    version    : 'v2.5' // use graph api version 2.5
  });
부분을 자신의 appID로 수정합니다.
facebook 예제와 제가 만든 간단한 로그인 로그아웃 버튼이 있습니다.
실행시키시면 페이스북 로그인을 하고 그 뒤에 적당히 사용자 이름을 받아와서
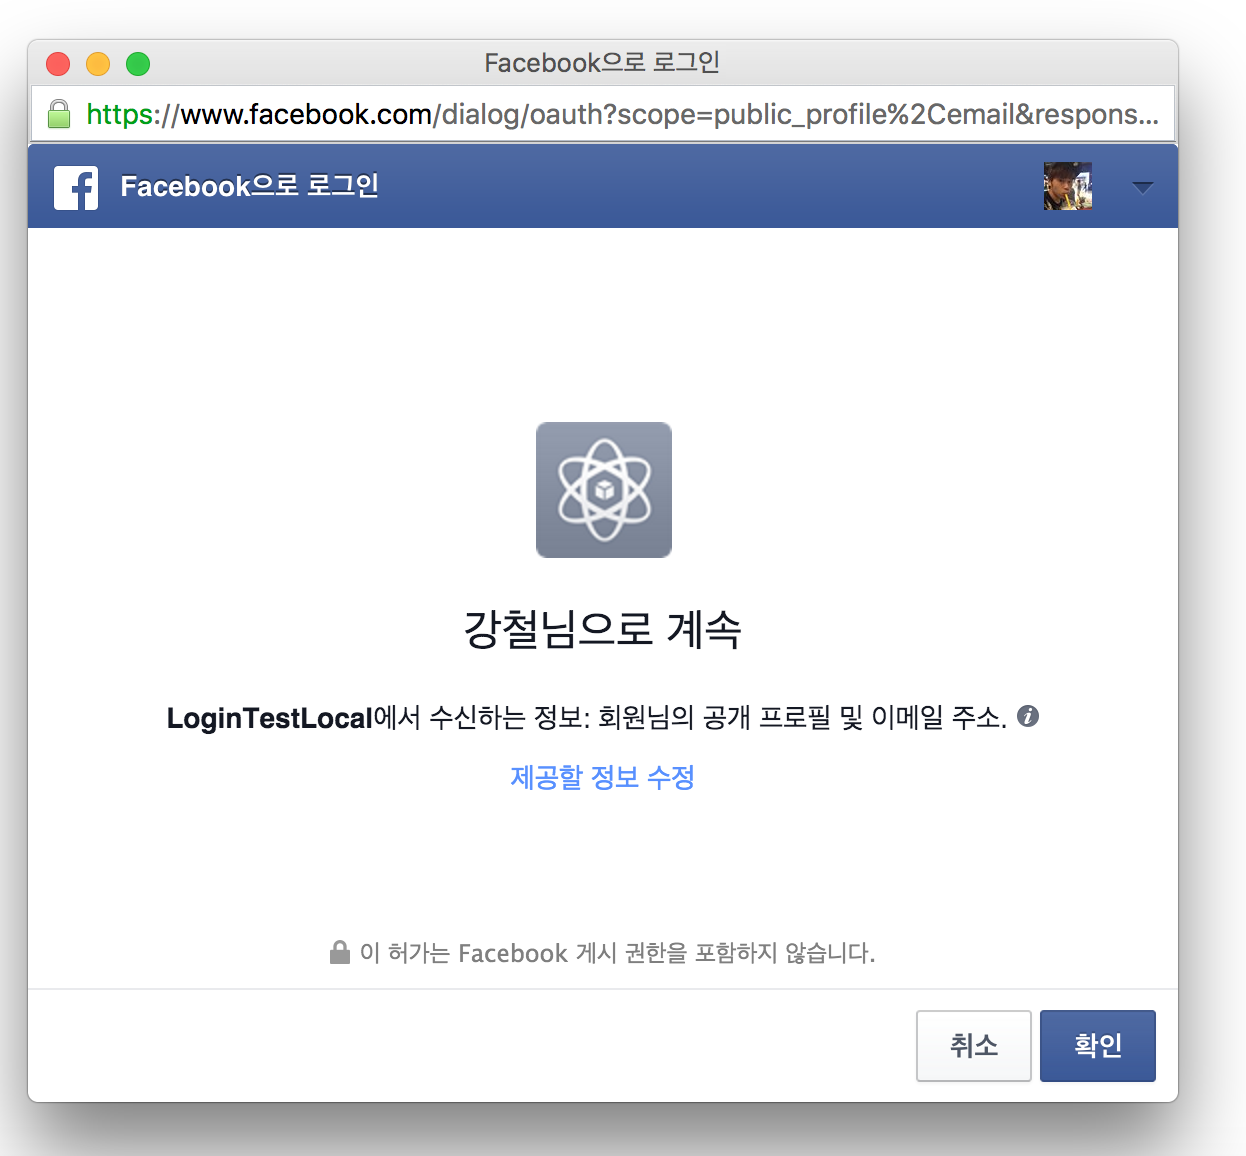
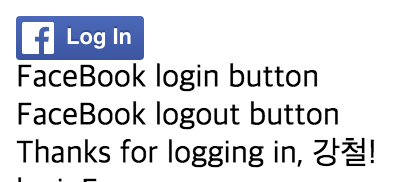
이런식으로 잘 됩니다. 몽고DB를 보면
잘 들어가 있습니다.

 값도 잘 받아오는군요. 이제 이 받아온 token을 저장만 하면 됩니다. 어디에 뭘 추가하면 될까요?
$.post('/api/login/facebook', postUserInformation, function(response){
            console.log(response);
            localStorage.setItem("token", response.token);
       });
프론트 엔드의 facebookLogin.js의 $.post 부분에 localStorage 저장을 추가해주면 됩니다.
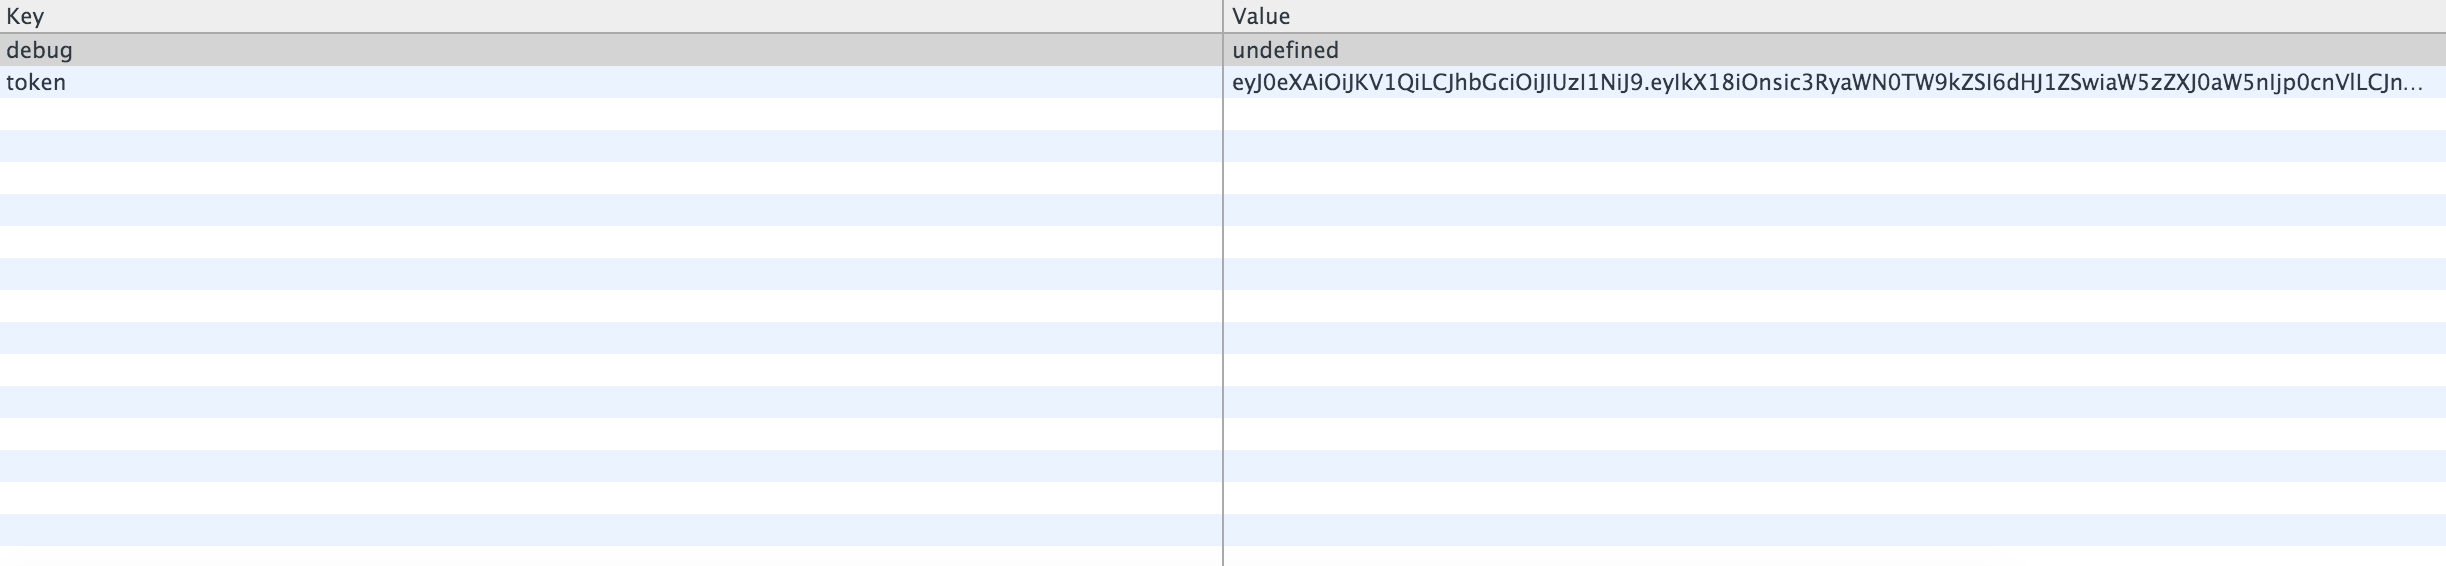
마찬가지로 잘 들어가 있습니다. 여기서 getEmail을 클릭하시면 local로그인과 같이 값을 잘 가져오는걸 확인 할 수 있습니다.
이러한 방식으로 facebook 로그인을 jwt을 이용하여 로그인 하게 만들었습니다. 4장에서는 iphone에서 로그인이 가능하게 만들어 보겠습니다.